In the previous article, How to Back Up in Openstack, I showed how to:
- Create a VM bc1
- Create new volume finance-vol1
- Attach finance-vol1 to bc1
- Format and make the filesystem on the new disk in bc1
- Put some data in the mounted new disk
- Create an OpenStack backup
Now, I will show how to restore volumes and snapshots in OpenStack.
Managing Volume Snapshots
The second method that OpenStack provides to make backups and restoration is via snapshot, the main difference between OpenStack volume backup and OpenStack volume snapshot is that the snapshot is managed by the block storage service instead of the object storage or swift. In this particular environment (packstack) the backend storage is LVM, so will see how OpenStack creates new LVMs for every snapshot created.
First, let’s create a new volume finance-vol3:
#openstack volume create –size 1 finance-vol3
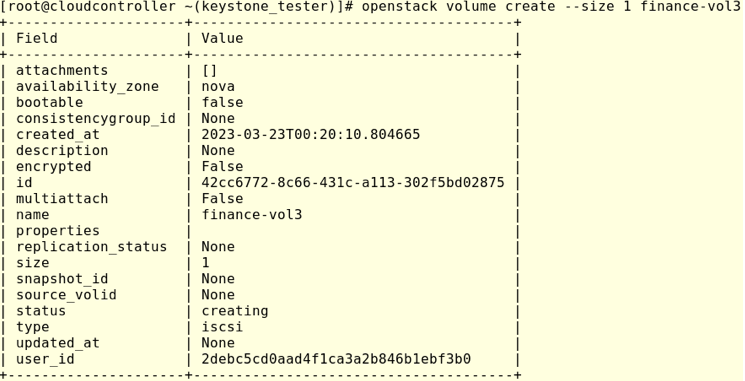
Adding finance-vol3 to bc1:

Again from computenode03, let’s login into the VM bc1 via the corresponding network namespace running:
[root@computenode03 ~]# ip netns exec ovnmeta-20393494-698c-4d88-8576-faf0166ec845 ssh -i finance-key [email protected]
Once logged into bc1, check that the new disk is available:

Let’s format the new disk finance-vol3 and make the filesystem ext4:
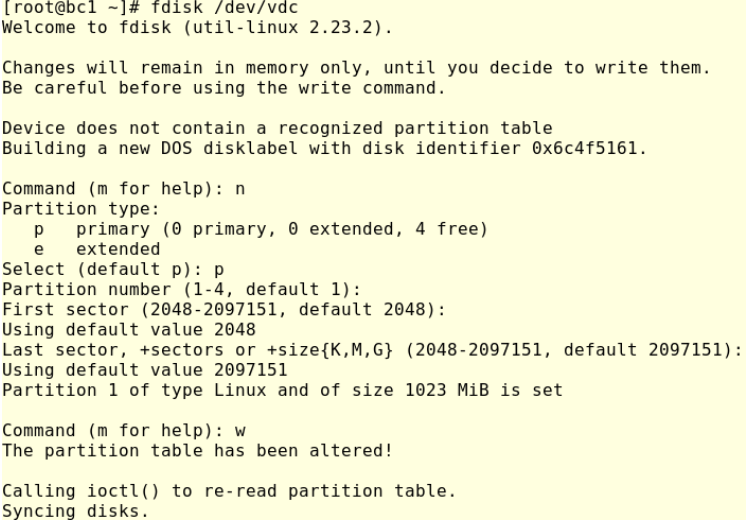
Again, we can see fdisk has created the partition vdc1:
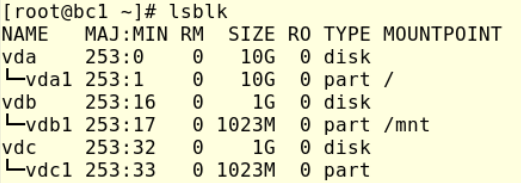
Now, make the file system, mount it and put some data there:
[root@bc1 ~]# mkfs.ext4 /dev/vdc1

[root@bc1 ~]# mkdir -p /var/volume_2

[root@bc1 ~]# mount /dev/vdc1 /var/volume_2

[root@bc1 volume_2]# wget -P /var/volume_2/ http://cdimage.debian.org/images/cloud/OpenStack/10.13.11-20230221/debian-10.13.11-20230221-openstack-amd64.qcow2
Additionally, let’s make a md5sum just for verification:

Go to cloudcontroller and check the available disks, and note the status of both disks, which are in use. This is because both volumes are attached to bc1.

Let’s try to create a snapshot running:
#openstack volume snapshot create –volume finance-vol3 finance-vol3-snap
![]()
As we can see above, OpenStack is warning that the volume is used, and it must be in the state available to make the snapshot. To fix this lets first unmount the volume in bc1 and then, de-attach from bc1, so in bc1 run:
[root@bc1 ~]# umount /var/volume_2/
In the cloudcontroller run:
[root@cloudcontroller ~(keystone_tester)]# openstack server remove volume bc1 finance-vol3

Let’s list the available snapshots:

We can see that our snapshot was successfully created. Now, how can we use/restore the snapshot finance-vol3-snap?
In the next section, I’m going to create a fourth volume but first, let’s attach finance-vol3 to bc1:

Next, let’s create a new volume named finance-vol4-from -snap, but this time let’s add the attribute –snapshot finance-vol3-snap to the OpenStack command. This means that OpenStack will create a new volume and dump finance-vol3-snap in the new volume finance-vol4-from-snap.
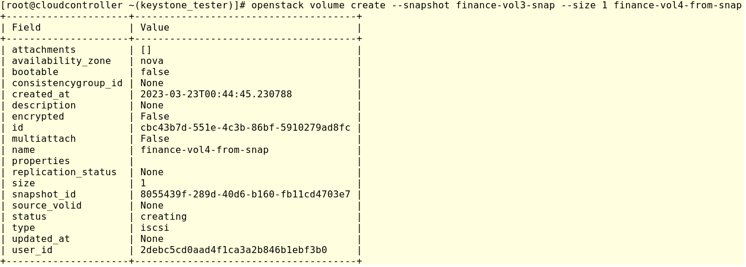
Let’s attach the new volume finance-vol4-from-snap to bc1:

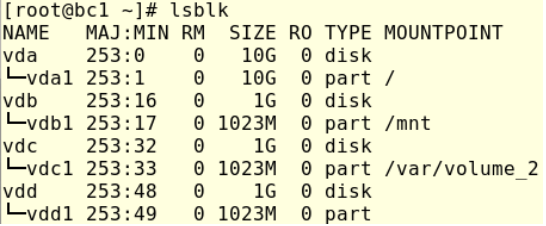
Let’s create a new directory to mount finance-vol4-from-snap recognized by bc1 as vdd1:
[root@bc1 ~]# mkdir -p /var/snap
Then:
#mount /dev/vdd1 /var/snap/

We can see above all the data was successfully restored to the new disk. Finally, let’s check how the block storage is managing the snapshot. As I said before, in this LAB, the block storage backend is LVM, so check how cinder is administering the snapshot that was previously created.

![]()
As we can see, the block storage service has created an LVM for the snapshot finance-vol3-snap. We can also verify how the snap is linked to the volume finance-vol3.
In this small tutorial, we were able to learn how OpenStack provides functionalities for restoring volumes and snapshots. To learn how to back up in OpenStack, check out part one.
Want to write a blog post or have an idea for a Superuser article? Fill out the form at openinfrafoundation.formstack.com/forms/superuser_pitch or email [email protected] to submit your pitch.
- Working with Swift, the Object Storage service in OpenStack - April 21, 2023
- Part 2 – How to Restore Volumes and Snapshots in OpenStack - March 27, 2023
- Part 1 – How to Back Up in OpenStack - March 27, 2023

)


