In this tutorial, I’ll show you how to run Windows Server 2016 on OpenStack.
Preparation
Download a Windows 2016 Server ISO image at Microsoft (requires registration.)
Download the Fedora VirtIO drivers. You can find more options here.
In this example we will use VirtalBox, although you can also use KVM on Linux for this.
Create a VM inside VirtualBox
- Choose a name, as a type, choose
Microsoft Windows, and as a version chooseOther Windows (64 bit). - Assign the VM a
minimum of 2GBmemory. - Create a virtual disc with a
minimum disc-space of 15GB, the standard 20GB is fine, as a type, chooseQCOW.
When the VM is created, do not start it yet. We first have to fine-tune certain things in the settings screen:
- System > processor: Add a second CPU, this saves us time
- Ports: Enable the first serial port (COM1), this is for logging and debugging purposes
- Storage: Change the first CD-ROM to primary slave
- Storage: Connect the first CD-ROM to the Windows ISO you’ve downloaded
- Storage: Add a second CD-ROM (secondary master) to the existing IDE controller and connect the virtio driver disc to this CD-ROM
- Audio: Disable audio (unless you like to use it)
- Network: Change the network to bridge mode, this way you can access it with RDP
- Network: Change the network type to virtio-net
Now you have a VM you can boot.
The two ISOs now have the correct start-up sequence, after booting, your VM will start to install from the ISO.
Installing Windows
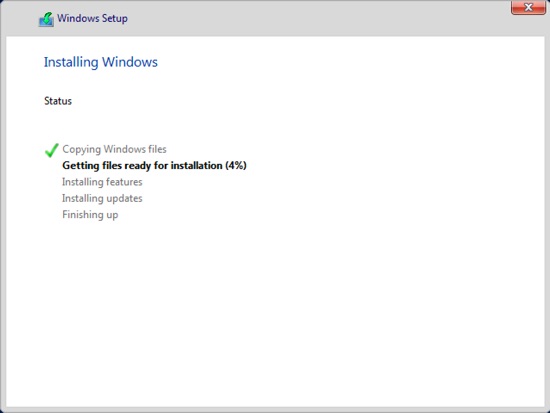
After booting the VM, the installation of Windows will start automatically.
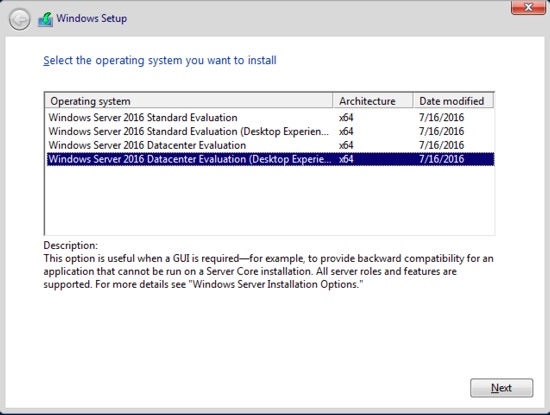
Windows wants to be aware of some regional settings, after which it will ask which version of Windows to install.
- In this example we will choose Windows Server 2016 Datacenter Evaluation (Desktop Experience)
- Read the license terms, if you want to continue, you will have to accept them
- After this, choose Custom installation
Installing Drivers
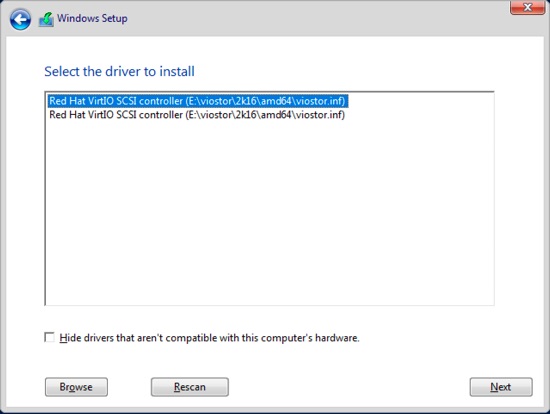
Now you have the option to install the viostor SCSI drivers, these are necessary, even though we use the IDE controller of VirtualBox at this moment.
To see the drivers, navigate to e:\viostor\2k16\amd64\, and remove the checkbox so you can see everything.
Choose the disc and let the installer do its job.
Finally, Windows will ask for a passphrase, after that the installation will be finished. Because you want to create an image, you now have to edit your own settings. There are many manuals available on rules about what you can and cannot edit, and why. We will limit ourselves to the necessary settings.
- Log in (and leave Windows for now, Server Manager wil start alongside a few background processes)
What stands out is that the network isn’t working, this is because the drivers have not been installed.
- Navigate to
E:\NetKVM\2k16\amd64and install netkvm.inf (select the file and press right mouse button) - Next, install the IO drivers
E:\viostor\2k16\amd64\viostor.inf(select the file and press right mouse button)
After this, the NIC will work, we will need this in a while but now we know for sure that the necessary IO drivers are installed.
Remote Desktop
To be able to use RDP later on, which makes maintenance easier, we have to change two things:
- Start Powershell to open the firewall for RDP:
powershellEnable-NetFirewallRule -name RemoteDesktop-UserMode-In-TCP - Click on Start > Settings, and search for remote desktop, now choose
allow remote desktop access to your computer. - In the popup choose for
Allow remote connections to this computer, Click OK to close the popup. - If you are using an unofficial- or older RDP client, remove the checkbox below.
- Click on Apply and press OK.
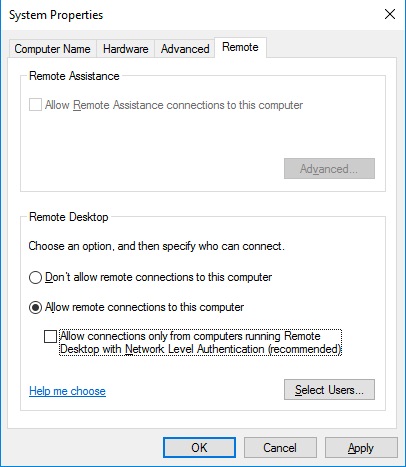 You can now test the RDP connection, which should work by now.
Cloud-Init
To be able to use Cloud-Init (we need this to, for example, be able to set an admin passphrase when deploying) we have to configure this:
powershell
Set-ExecutionPolicy Unrestricted
After this, download and install Cloud-Init:
Invoke-WebRequest -UseBasicParsing https://cloudbase.it/downloads/CloudbaseInitSetup_Stable_x64.msi -OutFile cloudbaseinit.msi
The download is approximately 40MB
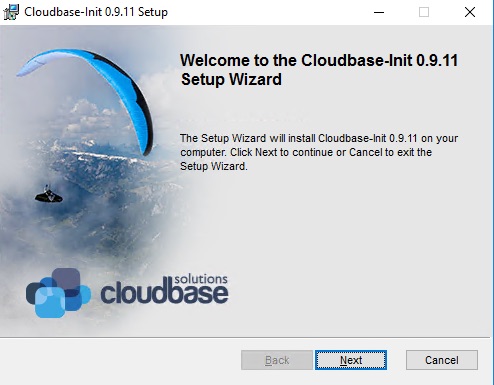
./cloudbaseinit.msi
- Click Next
- To continue, you will have to read and accept the license terms
- Click Next
- The default settings will be fine, again click Next
- Leave everything be except for the Serial port for logging, set that to COM1
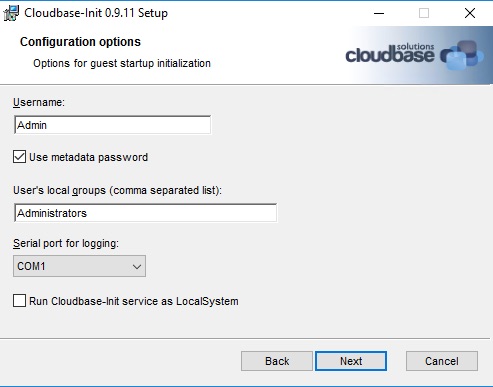
- Next…
- Install
When the installation is finished, select both run Sysprep and Shutdown when Sysprep terminates.
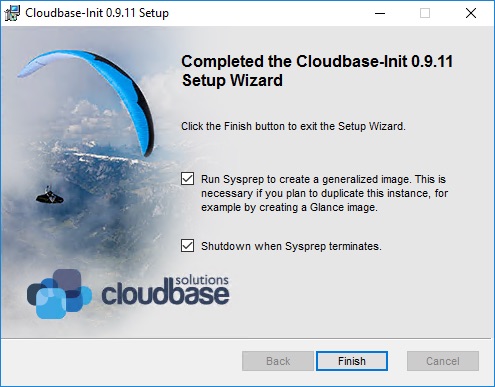 If you click Finish the Windows installation will be prepared for use as an image and the VM will be closed.
Now you have a Windows image that is switched off, based upon a qcow file which we can upload to OpenStack.
Uploading the Image
When the upload speed of your internet connection isn’t that high (because Windows images are mostly around 10GB) I suggest you use the OpenStack CLI tools for this (see below).
Option 1: Upload with an OpenStack Dashboard
- Go to an OpenStack Dashboard
- Login
- On the left, choose ‘Images’
- Create Image
- Enter a name and a description
- Image Source > Image File en select the
qcowimage you have created. The location can be found in VirtualBox. In my case it’s aqcowof nearly 13GB. - Change the format to Qcow2
- Architecture: x86_64
- Minimum Disk: 20
- Minimum RAM: 2048
- Create Image
Now, the web-interface will upload the entire image, after which it will be processed and put inside the list of available images.
Option 2: Upload with OpenStack CLI tools
Make sure that the OpenStack CLI tools are installed on your system. If not, you can follow our CLI tutorials.
To be able to create a new image you have to enter the following command in the terminal:
openstack image create "imagename" --disk-format qcow2 --min-ram 2048 --min-disk 20 --file /path/to/image/imagename.qcow
If uploading will take longer than an hour you will get a 401-error, you get this error because in the meanwhile your token has expired. You can ignore this error. Enter the following command to make sure your image has been added to the list of available images in OpenStack:
openstack image list
If you don’t see the new image in the list, try to create it once more.
Starting Windows
To launch a Windows instance now, you have to follow the normal procedure except for two differences:
- Go to the Fuga Dashboard
- Login
- On the left, choose
Access & Security. Click onSecurity Groupsand add a security group with RDP access for the IP you’re connecting from (Go to this website to retrieve your IP). If you do not have this yet, you can also add this, and connect the Security Group to your instance later. - Create a new instance in the Instances panel. To be able to login Windows later, you need a passphrase. The passphrase we had set earlier does not work anymore. Click on the Metadata tab to add a new custom key
admin_pass, after which you can assign a value which is shown in plain text. This is a bit annoying, but you have to change the passphrase again after the initial login anyway.
Sources
This post, written by Yuri Sijtema, was first published on Fuga Academy, the learning branch of Fuga Cloud, a self-service, on-demand, cloud service based in the Netherlands.
- Exploring the Open Infrastructure Blueprint: Huawei Dual Engine - September 25, 2024
- Open Infrastructure Blueprint: Atmosphere Deep Dive - September 18, 2024
- Datacomm’s Success Story: Launching A New Data Center Seamlessly With FishOS - September 12, 2024

)
